Friday, October 24, 2014

FOTN: Too Faced Chocolate Bar Palette

Hey everyone! I wasn't going to post this at first (I didn't even take pictures), but after we got back home I decided I really liked how everything turned out! The weekends are the only time I really get to take my time to do my makeup. Since I work (more like live) at a mill 6-7 days a week, I don't really do my makeup much. So you best believe I get uber excited when the weekend comes!


I did use quite a bit of products for this look. I feel like I've been using the same things over and over and neglecting everything else I have. There were also some new products I haven't tried yet, so I took the opportunity to test them out!


The lighting wasn't very consistent, so I added these two for you too see how the outcome looks in different lighting. Plus I was loving my new comfy sweater my bf bought me earlier(;

Prime and Conceal


⚫ Rimmel Fix & Perfect Pro Pimer.
⚫ Maybelline BabySkin Insta Pore Eraser.
⚫ L'Oreal True Match Super-blendable Concealer.
⚫ E.l.f High Definition Under Eye Setting Powder.

Once I toned and moisturized, I used Maybelline's BabySkin to prime my t-zone to blur any visible pores. This was the fist time using this product, expect a review (and possibly a comparison)!

I used my favorite Rimmer primer around the rest of my face. Then, I used my favorite concealer to hide any blemishes I may have and under my eyes to help brighten up my dark circles. And lastly, another product I hadn't yet used was the E.l.f HD Undereye Setting Powder to set the concealer. Though, I didn't just set my undereyes, I used it everywhere I used the concealer (i.e cheeks, chin, around the forhead).

Foundation and Illuminate


⚫ Nyx Born to Glow Liquid Illuminator.
⚫ Revlon Colorstay 24Hr Makeup.

I didn't do anything special with these, I just mixed them on the back of my hand with a brush and applied as usual. 


⚫ E.l.f Blush Palette in Dark.
⚫ E.l.f Contouring Blush & Bronzing Cream.

I used the bronzing cream to contour, and the blush on the apples of my cheecks. From the E.l.f Blush Palette I used the top left peachy color right over the cream blush very lightly to set it. 

Eyes


⚫ Too Faced Chocolate Bar.
⚫ E.l.f Liquid Eyeliner in Coffee.
⚫ Revlon Photoready Eye Primer + Brightener.
⚫ L'Oreal Voluminous Million Lashes Excess.


Top Row:

⚫ I used the 1st Star (White Chocolate) all over my lid, up to my brow bone.
⚫ I used the 2nd Star (Milk Chocolate) in my crease.
⚫ (Very last step) I used the 3rd Star (Triple Fudge) in my outer crease to add definition.

Middle Row:

⚫ I used the 1st Star (Salted Caramel) all over my lid, and with a blending brush lightly blended it with my crease to rid any harsh lines.

Bottom Row:

⚫ I used the 1st Star (Hazelnut) in my outer crease and blended it out.
⚫ I used the 2nd Star (Champagne Truffle) in the inner corners of my eyes to help brighten them a bit. Again blending everything together to rid andy harsh lines. 

That was my look for tonight! I hope you all enjoyed and thank you for reading!

Have you tried any of the new products I mentioned?
If so, let me know your opinions down bow!(:


Wednesday, October 22, 2014

Fall Favorite: Coconut Oil

Usually around Fall and Winter, I like to do what I can to really bring my hair back to life. Even though I do not use heat on my hair what so ever, it is damaged from hair dyes. This time of year as we all know, is a lot colder than the Summer months. So you can probably imagine the drastic changes our locks have to get used too as the season changes (especially if you're from New England. The weather doesn't know if it's coming or going.)

 I have long, dry, curly, very thin hair. But I have a lot of it. And as previously stated, it is dyed. My hair is also prone to breakage and split ends (sigh). 

Another bummer to add, my hair is low porosity. What does that mean? Well, basically, my hair has a hard time absorbing moisture, or any products. Knowing your hairs porosity is really helpful in terms of caring for it and getting the most out of your styling products. That's a whole other post on it's own though. If you're interested and would like a separate post, let me know in the comments!

So, how do I bring my hair back to life during these colder months? Two words. COCONUT OIL! 


Coconut oil has a ton of different uses, but my favorite is using it as a hair mask/hot oil treatment. I usually do a hot oil treatment every other week, but since this year my hair has become really dry, I like to do it every week. 


Depending on your hair and your preference, you can either use the heat from your hands to melt it, then apply; OR, you can scoop some into a microwave safe bowl and heat for a hot oil treatment. Since my hair is low porosity, I typically heat it up so the heat from the oil helps open up the cuticle and absord more easily. 

What's really great about coconut oil, it's the only oil that can actually enter the cortext (the inner part of the hair) and help your hair from the inside out. Literally! By being able to penetrate the cortext, it can help improve it's strength and flexibility. Which means less breakage and split ends! Awesome right? 

Now on to the fun part. 
Application


Split your hair in half.


-
*Don't mind my dirty shirt.. I just got out of work.


To your preference; brush, finger comb, or use a natural boar bristle brush to brush out any tangles. **Remember to always start from the bottom up!

I personally prefer using either my fingers or a boar bristle brush. Using a boar bristle brush does take longer be warned, but it's much better than a normal brush as it won't pull or cause more breakage. Especially because the bristles help evenly distribute your natural oils from root to tip. It takes me about 25-30 minutes to thoroughly brush through my hair, doing small sections at a time. Any natural boar bristle brush will do. I bought mine at Wal-Mart for around $2 and some change. However, if you're really not patient enough for that, by all means, you can use what ever brush you'd like.


After you've brushed through your hair, separate your hair into four sections. Clip or tie the front two sections on top of your head, leaving the back two down. 


Take about 1/2" to an 1" section of hair.


Grab your oil (about a tsp per section, more if needed) either hot or melted in your hand and slather evenly from root to tip. Mid shaft if you don't want to go up to your roots. This is generally how much I use for all of my hair in total. Still following about a tsp per section.


Once you have the back two sections done, bring down the front two and continue.


And lastly, it's time to wrap it up!


You can either use a plastic bag like I did or a towel. Either or helps to lock in the heat from your scalp, and really get the job done! You can let it sit for 20minutes to a few hours, or even overnight. Tonight, I'm just going to let it sit for a few hours then wash it out. 


Now, when it comes time to wash out, most people use shampoo. But fortunately, if you're no-poo or low-poo like myself, I did a ton of research and found that you can infact use just conditioner (silicone and paraben free) to rinse out the coconut oil.

 If for some reason however, that that doesn't work for you, you can add a bit of shampoo afterwards. Or you could skip the conditioner all together and only use shampoo. Again, your personal preference. Which ever way you choose, you may have to repeat as the coconut oil can be stubborn. Be sure to get as much out as possible, if not all. Leaving a little in your hair is okay, as it will act as a leave in. But too much will weigh your hair down.

And that is how you add coconut oil to your hair, and bring your hair back to life this fall! I know this was different from my usual posts, but I hope you all enjoyed. And if you have any questions, feel free to ask!

How will you bring your hair back to life
during the colder months?
Would you like to see more hair posts in the future?
Let me know your thoughts!(:


Monday, October 20, 2014

E.L.F Review: 13 Piece Face & Lip Palette

Last month I had recieved my second E.l.f Beauty Bundle, which you can read here. One of the products that was chosen for this bundle was the 13 Piece Face & Lip Palette. I was soo intrigued by this palette, because well, you all know I'm a blush girl!


The packaging is pretty plain and simple, yet different from their standard colors with the touch of purple. However, the actual palette it self is very compact and sleek with a matte finish. And of course the Eyes Lips Face name right on front.


As you can see, the prettyness doesn't stop there. The inside is simply gorgeous! You get two blushes, two bronzers, and nine lip shades. The palette also includes a lip brush and a blush/bronzer brush, either of which I probably won't use. 

SWATCHES

Blush and Bronzers:


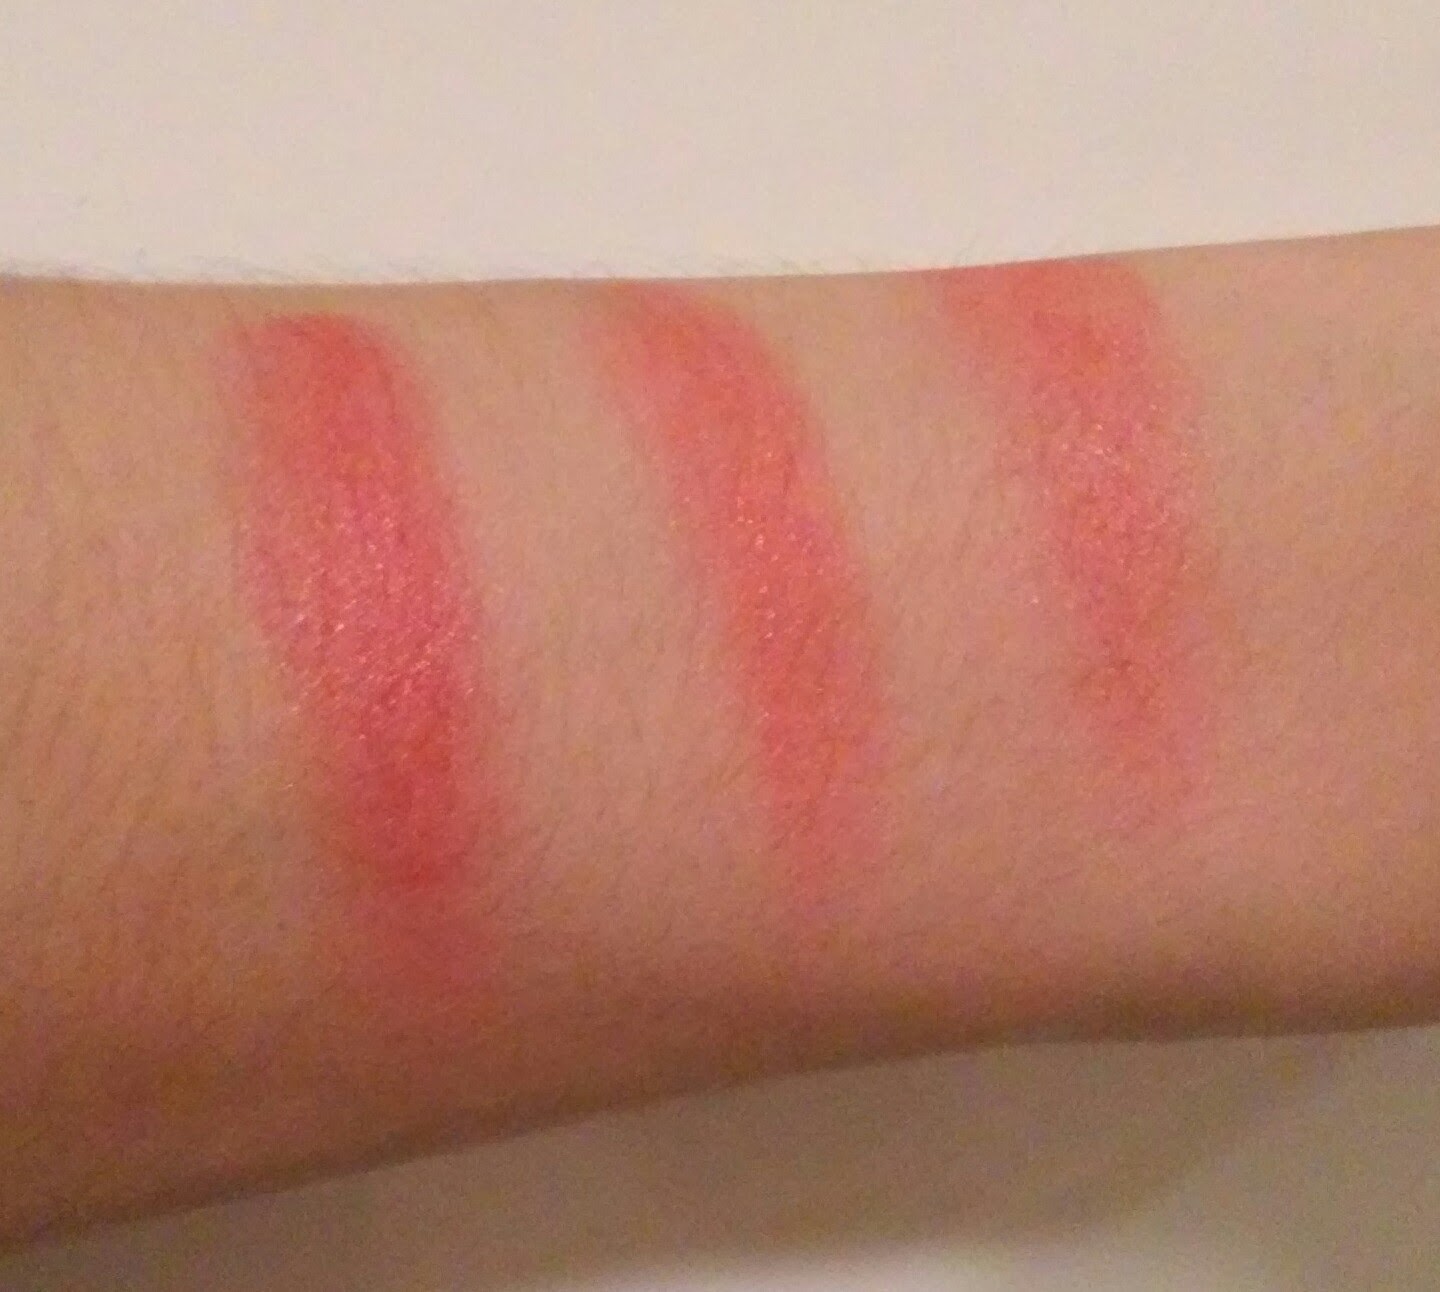
The first two swatches on the left mirror the blush and bronzer on the left side of the palette. The first blush is a pretty peachy neutral shimmery color, while the bronzer is a light golden shimmery color. I don't typically like shimmers in my bronzers, but if you're going for more of a luminous look, this would be good to use. 

The two colors on the right are also the blush and bronzer on the right side of the palette. The second blush is a light pretty baby pink color, and the bronzer is a slightly darker color than the first one you see. Both again are shimmery. But as you can see, they are all equally and nicely pigmented! For $8, you really can't beat that!

Lip Shades:
(Posted in the order of the palette)

(Top row)

(Middle Row)

(Bottom Row)

The swatches for the lip shades were a bit patchy the first time around. Evidently, I had to go over twice to clean the patchyness, and to see the color better. For the most part (expect for the bottom row), the pictures are true to their color. The bottom row is a bit brighter but not a huge difference. 

All the shades seem to be moisturizing and not that sticky like a lipgloss. They all also have a very slight barely noticeable shimmer to them. So much that I had a hard time deciding if they did or not. 

My overall thoughts/opinion

⚫ I loved the sleek packaging and the overall look and placement of the face and lip shades.
⚫ E.l.f says this is great for on the go, but I feel the dimensions of the palette are a bit too big for me to want to carry around. Definitely won't fit in the makeup bag.
⚫ The case is very compact. I feel assured that if I did bring it with me, it won't open up in my purse. 
⚫ Even though I said I probably won't use them, I do appreciate the fact E.l.f provided a face and lip brush. Will certainly come in handy if I forget mine!
⚫ The pigmentation is very impressive. Especially the blush and bronzers!
⚫ Very inexpensive, great if you're on a budget.
⚫ If you're a lip girl, you'll love this palette. If not, I would skip it. Although I love the blushes, I know I won't wear the lip shades often.

And that is all for this quick review, I hope you all enjoyed!

Have you tried this palette yet?
Leave your thoughts and opinions below!


EOTN: Too Faced Chocolate Bar

About a month ago I got my hands on the Too Faced Chocolate Bar since I had a 20% off coupon. Knowing how expensive they are, I did my research to find a good palette I wouldn't regret. Even though I had a coupon, it would still be expensive compared to what I'm used to paying, so I really took my time reading through every bit I could find on it. The Chocolate Bar had soo many great reviews, I knew this was it. This was going to be my first Too Faced purchase! So I was really excited to see that it was still in stock.  


I've played around with this a few times, but so far I came up with one look I really liked. Over the weekend my boyfriend, daughter, and I went to UNO's in Providence, so I wanted something nice and classic, but a bit sultry at the same time. 


This really is such a gorgeous palette, I wish this phone took as good of pictures as my old one (I'm sorry you guys :( ). I promise these colors are so much prettier in person, this picture does them no justice. But they smell amazing! These shadows are made with 100% cocoa, and they seriously smell of just that!


And this is the look I came up! 


How I got this look:

⚫ I used E.l.f smudge pot in Back to Basics as my base.

Top Row:
⚫ I used the 1st Star (White Chocolate) all over my lid up to my brow bone, and in the corners of my eyes and the inner part of my lower lash line.

Middle Row:
⚫ I used the 1st Star (Salted Caramel) in my crease.
⚫ I used the 2nd Star (Marzipan) all over my lid.
⚫ I used the 3rd Star (Amaretto) on my upper lash line (to complete the look once the rest of the eye was done).

Bottom Row:
⚫ I used the 1st Star (Hazelnut) and blended it out in my crease and up and the outer part of my lower lash line.
⚫ I used the 2nd Star (Creme Brulee) and tapped it lightly on my lid over Marzipan.

For my lashes I had used my L'Oreal Voluminous Million Lashes Excess. 

So that's it for today's post, I hope you all enjoyed and thank you for reading!(:

Have you tried the Chocolate Bar yet?
If so, tell me how you liked it,
I would love to know!


Thursday, October 16, 2014

October 2014 Favorites

Hello lovely ladies! Today I will be sharing my October Favorites. Fall time is here, which means darker colors are in! I have to admit however, I haven't been very good with stepping out my comfort zone for a darker lip. Unfortunately, I won't be including any lip products in this post today. Moving farward though, I have a few blushes perfect for fall I've really been loving!


I have quite a bit of favorites this month so I'll jump right in!


First, let me apologize for the super messy lid on my foundation. I was honestly too lazy to clean it out... 

Moving on, starting with the first face products we have:
⚫ L'Oreal True Match Lumi Healthy Luminous Makeup.
⚫ L'Oreal True Match Super-blendable Concealer.
⚫ Rimmel Stay Matte Primer.

L'Oreal True Match Lumi Healthy Luminous Makeup
I had originally tried this a little over a year ago and I LOVED it. But then I tried others, and when I ran out, I forgot all about this. Recently, I was reminded of this long lost favorite when I was watching someone on youtube. I made it a mission to get my butt to the store and track it down. And I'm soooo happy I did! To me, this has such a beautiful flawless finish, and covers wonderfully. 

Even though I have super oily skin, I forgot just how much I loved this stuff. I usually like my foundations nice and matte with no trace of shine or "glow" (I know I know, defeats the purpose), which is how I wore this when I first used to use it by setting with a powder. This time around though? I can truthfully say that I have only used a setting powder with this once. Every other time, I skip the powder all together. You must be thinking how, if I'm so oily and it states "Luminous" right on the packaging, wellllll that brings me to my next favorite! (Yes, I went out of order, I'm sorry.)

Rimmer Stay Matte Primer
I'm not sure if other matte primers exists, but seeing how the cosmetics industry is always changing and trying to be better than the next, I'm sure there are. I've never heard of them, but when I went to restock on my beloved Rimmel Fix&Perfect Pro Primer, this had caught my eye (not because it was right above it or anything) and I really wanted to try it. 

Like I stayed above, I usually prefer my foundations to be matte, which most of them are. So not to any (or some) surprise, a matte primer paired with a matte foundation, well.. It's just TOO matte. BUT, Rimmel Stay Matte Primer paired with L'Oreal True Match Lumi, a perfect combo! 

This primer dries matte, but still leaves a smooth canvas for foundation application. This also makes my (lumi) foundation the perfect balance of luminous and matte. It still has that luminous glow, without being too oily or shiny. I feel like this primer controls that aspect extremely well, and my makeup even lasts all day. This is definitely a new staple piece in my collection, and the only one I will use with the lumi foundation!

L'Oreal True Match Super-blendable Concealer
I've only tried a couple concealers, but so far I really like this one. It covers my dark circles when I don't get enough sleep, and redness from sore breakouts. I haven't used concealers much until last month, since I really had no reason to. This lasts all day, but if you apply to much, it will get cakey. I really want to try out the Mac Pro-long Concealer, have any of you tried it? But until then, this is my current favorite and I would definitely recommend it!


Next I have a couple blushes to show. Blushes are my absolute favorite piece of makeup. I just love the gorgeous flush of colors you can choose to help really pull any look together.

⚫ E.l.f Blush Palette.
⚫ Flower Beauty Cream Blush.
⚫ Maybelline Fit Me Blush.

E.l.f Blush Palette 
When I was shopping on the E.l.f site about a month or two ago, I was really excited when I saw this. I'm a blush fanatic (if it isn't obvious already(; ), so of course I had to have it! There are two different palettes with convenient names "Dark" and "Light. I own both. My favorite one at the moment, can you guess? .. The dark palette! But since it was late afternoon when I took these pictures, the lighting is really off so here is a better image:


The lighting is still a bit off, but this shows the color much better. The colors I've been using the most are the two on the right. The top right is a really pretty darker form of a babie pink color, while the bottom right is a darker berry color. I do plan on doing a full indepth review of both palettes soon!

Flower Beauty Cream Blush
Flower Beauty is a new cosmetics line made by Drew Barrymore, which are sold exclusively in Walmart stores. Her line is very affordable, and of good quality (from her intentions and what I hear). I have only tried two products from this line, with this being one of them. There are several different blushes, and I believe I got the darkest shade? I'm not sure, it's been awhile. The color I got however is "Rose-O-Den-Dron". A unique name to say the least. But the color payoff, and how it looks and feels on your cheeks. Phenomenal. I'm obsessed. It's the perfect shade for fall, and I definitely plan on going back for more (when I'm not broke of course!).

Maybelline Fit Me Blush
The last blush I have been loving this month is this one from Maybelline's Fit Me Line in Light Nude. Even though the name is nude, I certainly see a peachy tone to it. It's by far a gorgeous color, but it does take a few strokes for it to show up on my fair skin. I really love the color though, so I don't mind. I'm not sure if all the blushes in this line are like this, as I only own one, but I do plan on adding more to my growing collection. 


For eyes, I have a few products I've been loving and obssesing over.

⚫ Estee Lauder Sumptuous Bold Volume™ Lifting Mascar Sample.
⚫ Maybelline The NUDES Palette.
⚫ L'Oreal Voluminous Million Lashes.
⚫ E.l.f Smudge Pot.

Estee Lauder Sumptuous Bold Volume™ Lifting Mascara
I've never tried a high end mascara before until I recieved this in a gift set along with my purchase. This is also the first time I have used a fiber mascara. And I have to say, the first stroke/coat seriously amazed me. I have never tried a mascara that was anything close to this. I would definitely by the full size if it were in my price range. This gives both awesome volume and length, I couldn't ask for anything more. And being a fiber mascara, I had no problem with getting anything in my eyes (yay!). The formula on this is great, not to wet or dry. Perfectly in the middle. And since I like my mascaras to be more dry, a few days of using, I love it even more(;

Maybelline The NUDES Palette 
Everyone has already raved about this all over the beauty community, and I just had to add to the hype! I haven't worn eyeshadows in years. I didn't plan on buying this, but one day I said what the heck. It's cheap, affordable, and in arms reach. I wanted to see what all the fuss was about, and boy do I ever! With 12 different shades, the possibilities are nearly endless! And they blend sooo smoothly (with an eye primer of course). My eyelids do tend to get oily also, and so far I have gone a full work day with no creasing. I have not tried using this without a primer, so I really can't be sure if it's the primer or both. I'm certainly happy I finally caved though, definitely going to be a repurchase for me!

L'Oreal Voluminous Million Lashes
I picked this up when I couldn't find my beloved one by Rimmel. I haven't tried many L'Oreal mascaras, simply for the fact I haven't had much luck. But this. This one really takes the cake! My lashes look so full and rich, I believe I have a new hg. I honestly wasn't expecting much, but I have to stop judging a book by it's cover..or brand. Just because I had no luck with a few, doesn't mean I will with all, right?

E.l.f Smudge Pot
If you saw my beauty bundle post, then you should remember this. This is a cream eye shadow in the color "Back To Basics". I don't really use this as a straight shadow, but rather a base/primer. I've ony used this with the Nudes Palette, and it does a great job. The color is a pretty light shimmery gold, and goes with just about every color beautifully. The color payoff is also really great. I love the formula and smooth consistency of this. Super easy to apply with an eyeshawdow brush or just using your fingers!


And finally, contouring! 

⚫ Covergirl Tru Blend Pressed Powder.

Covergirl Tru Blend Pressed Powder
I haven't really found anything that I really like to use for a contour. I know your supposed to use a cool tone color, but since I have no idea how to tell what undertone a product has, I'm left guessing. This is a good product, and since I've been using it the majority of the month, I decided to add it to my favorites. However, I'm not sure this is really my favorite product to use to contour with.. I got this in the shade "Translucent Honey", thinking any darker would have been too dark. But, I was wrong. This shade is a tad too light. I'm still deciding if I will pick this up in a darker color or not or try something else. We shall see!

*I know this is up a bit early, but since we are moving in just over two weeks, I wanted to make sure it was up in case I get too busy. But that is all for my favorites this month, I hope you enjoyed!

What have you been loving this month?!


Sunday, October 12, 2014

Big News + EOTD!

If you have read my second post, then you would know my family and I have been going through a hard time. I didn't give specific details, and I don't plan to now, more so because it is a very personal matter. However, just when I thought this horrid thunderstorm would never come to an end, sunshine had finally shed it's light!

About a week ago we were at my daughters aunt's house, and she was telling us about a home her family was looking at. Her family is a bit larger than ours, now that they have a newborn, so it turned out to not be very ideal for them. 

As I'm listening to her go on in great detail, I couldn't help but think how perfect it sounded. Since she had said they weren't taking it, I asked if she would mind giving us the number to call and check it out for ourselves. Well, once we left, I called and was told we could come right down. So of course we headed right to it, and my goodness it was beautiful and so spacious! Plus it had an extra bedroom, which is perfect for when we finally decide to have another baby. 

Well, a week later (today) we put down a down payment. And guys, WE MOVE IN THREE WEEKS!

Now that I got to share my good news with you, here is my EOTD!


Don't mind the lil mess from my mascara, and the fact I accidentally went a tad far in my crease, and that annoying hair... Other than that, here's the look I created today using the Maybelline's NUDES Palette. 


How I got this look:

*Note: I used E.l.f's smudge pot in Back to Basics all over my lid up to my brow bone.

Bottom row:

⚫ I used the 3rd X(Fifth color in) all over my lid up to my brow bone.
⚫ I used the 1st X in my crease and blended it out.
⚫ I used the 2nd X(Forth color in) I used in the outer corner and blended slightly in my crease and out.

Top row:

⚫ I used the 1stX(Forth color in) I used in my inner crease and blended 2/3 on the lid.

This was just a quick* post, but I hope you all enjoyed this look! I'm loving this palette more than I thought I would!

Have a fun and safe weekend everyone!

Saturday, October 11, 2014

FOTN: Featuring Maybelline's The NUDES Palette

So I was going to wait till tomorrow to try out the new Maybelline palette, but I was too anxious I couldn't wait. 


First, let me apologize for the horrible quality of these pictures. Unfortunately, my phone finally had enough, and was forced to buy a cheap one until I can afford the one I really want. (No, I do not own a camera).

But anywho, this is the look I came up. And I have to say, I was really happy with this palette. Now I can't wait to find Maybelline's other new palettes, The SMOKES and The BRIGHTS. Have any of you seen or tried them yet?!


This is everything I used to create this look.

For the face:


⚫ Rimmel's Stay Matte Primer.
⚫ L'Oreal Paris True Match Lumi Healthy Luminous Healthy Makeup.
⚫ L'Oreal True Match Super-blendable Concealer.
(to conceal and highlight).
⚫ Covergirl Tru Blend Pressed Powder in Translucent Honey
(to contour).
⚫ Maybelline Fit Me Blush in Light Nude.

For the lips:


⚫ Nyx Butter gloss in Creme Brulee.
⚫ Revlon Super Lustrous Lipstick in Violet Frenzy.

First I coated my lips with Revlon's Violet Frenzy. I let it sit fot a few minutes before wiping it off to leave a stain behind. Then I topped it off with the Creme Brulee Butter gloss.

For the eyes:


⚫ Rimmel Scandaleyes Retro Glam Mascara.
⚫ E.l.f Eyelid Primer in Pearl.
⚫ E.l.f Eyebrow kit.
⚫ Curling wand.
⚫ Maybelline's The NUDES Palette.


Even though the Maybelline's NUDE Palette comes with pre-set looks with directions on the back on the packaging, I decided to be creative and do my own look. Well, this is what I came up with! 


Top Row:

⚫ The 1st X I used all over my lid, up to the brow bone as the transition color.
⚫ The 2nd X I used all over my lid.
⚫ The 3rd X I used in my crease and blended it out.

Bottom Row:

⚫ The 1st X I used in the inner corners of my eyes.
⚫ The 2nd X I used in my outer crease and blended it out. I also used this to line my bottom lashline.
⚫ The 3rd X I used also in my outer crease and blended out to add definition.

Like I had said before, I don't wear eyeshadow much, so I am an amateur in training! But I hope you all enjoyed this post and liked the overall look. Have a fun and safe holiday weekend everyone!

Have you tried The NUDES Palette yet?
What about the other two new palettes?