Thursday, October 30, 2014

E.l.f Review: Contouring Blush & Bronzing Cream + Quick tutorial.

A few weeks ago I went on an E.l.f splurge and got some really great products. I haven't tried them all, but the few I have will definitely be a repurchase for me. So expect many more reviews to come!

I have to say though, for being such a cheap makeup brand, E.L.F has some pretty dang good hg products. Of course they have their "misses", as does every brand. But their Studio Contouring Blush & Bronzing Cream is most definitely a new hg for me! 


Now, let's get on to the review!

(E.l.f Contouring Blush & Bronzing Cream in St. Lucia)

From E.l.f's Site:

Details: 

$3

"Ideal for all skin types, this dual cream bronzer and blush creates a sheer, natural wash of color on the skin. The lightweight cream-to-powder formula provides extended wear and allows you to layer for desired intensity. Sculpt eyes, cheeks, lips, body and anywhere you wish to highlight and contour with the rich cream formula."

How to:

"Apply a small amount of the Bronzer with fingers or a sponge to the hollows of the cheeks for definition and around the face line to create a healthy glow. Blush on the apples of the cheeks to create a subtle healthy glow. Blend and build coverage for ideal color."


E.l.f packaging is very similar to Nars. Expect with hard plastic versus a soft matte feel. Does that make sence? I like it though, I feel it adds a classy touch. Not like childs play makeup, considering the price. It's lightweight, without feeling cheap, and perfect for travel. Especially with a mirror as big as the compact!

Also, accoding to some others from the beauty community, the powder version of this, also in St. lucia, is said to be a dupe for Nar's Blush and Bronzing duo in Laguna & Orgasm. Since I don't own any Nars products, I can't say for myself. But from seeing online comparisons, I would believe so. Nars being more pigmented though, ofcourse.
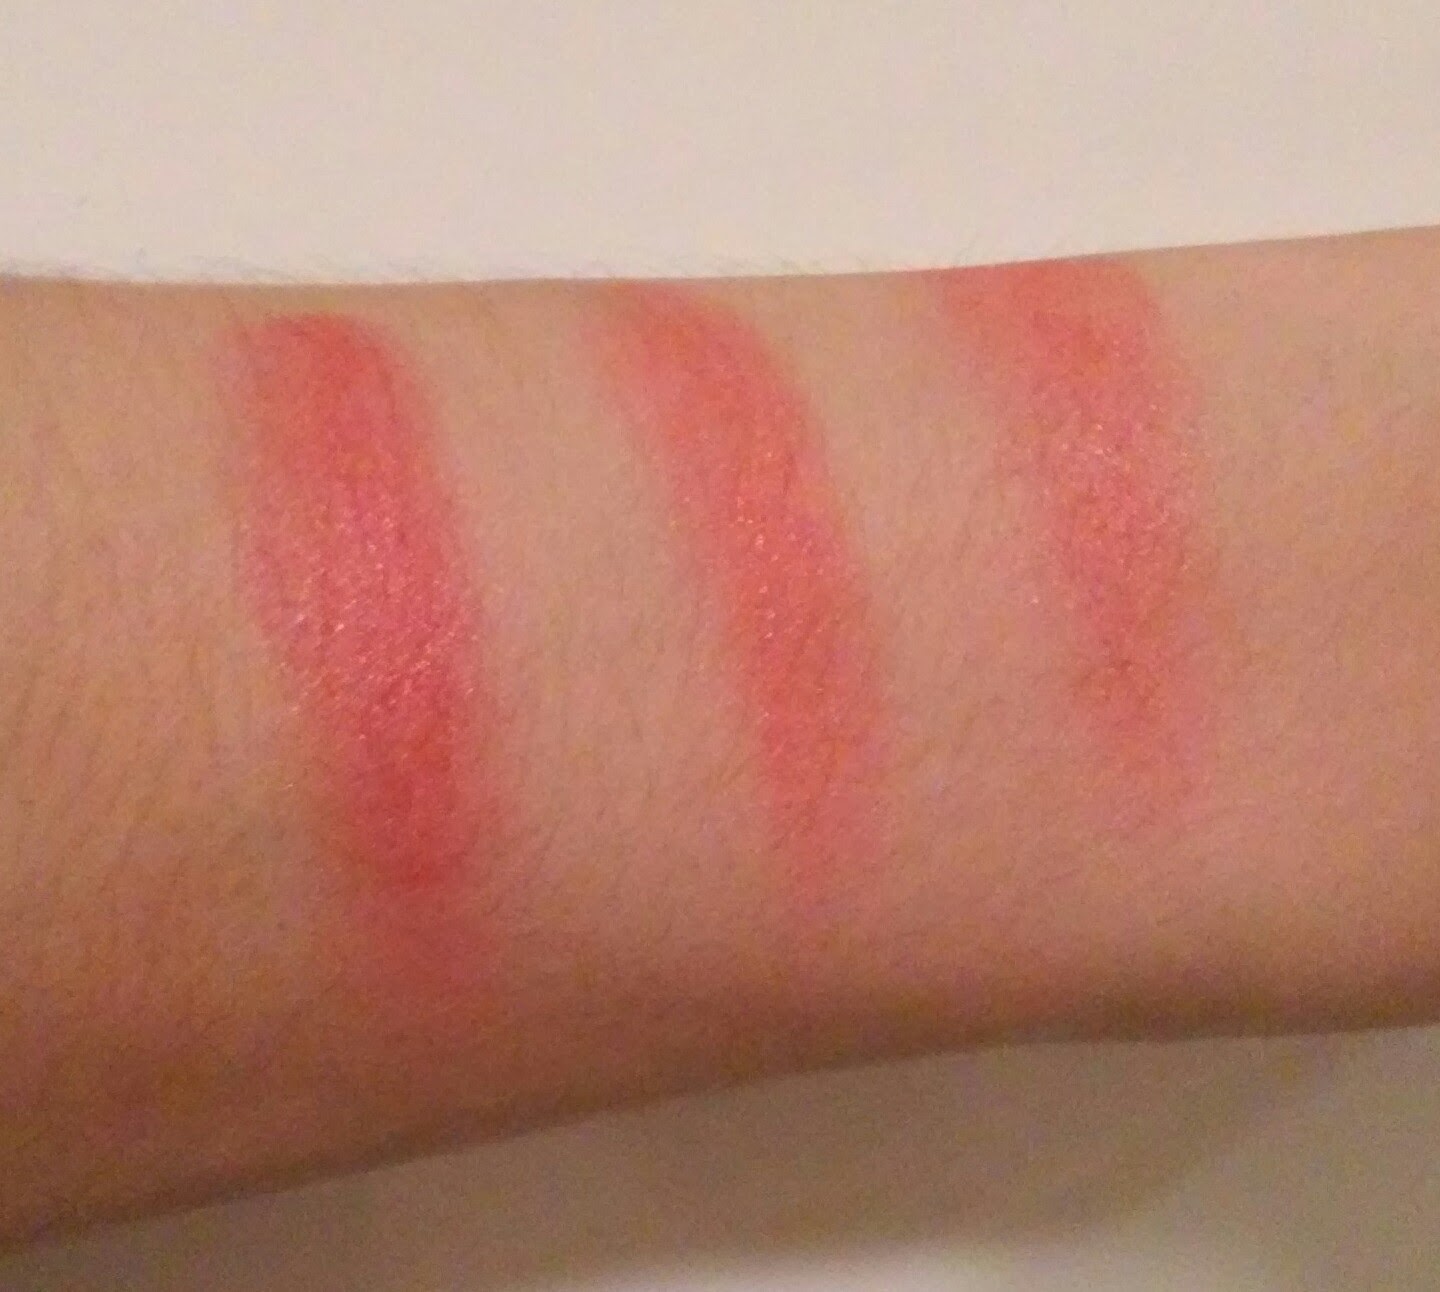
Swatches:


As you can see, they are most certainly very VERY creamy! It feels so lovely to touch. And the colors are gorgeous!

I was really impressed with how true to color these were to what's in the pan. Don't be scared though! The bronzer blends out very beautifuly, into a nice sheer finish. And it is build-able. I know by looking at how pigmented they are, you probably think I'm crazy. But you will see what I am talking about, so stay with me!


The blush is a very pretty peachy-pink color. While the bronzer is a nice bronzy brown? Color. I'm not good at dicifering undertones, so correct me if I'm wrong. But I feel like there are no red or organgy undertones, so you won't have to worry about this making you look orange or even muddy for this with fair complexions.

Another plus, no shimmer! However, E.l.f claims this is a cream-to-powder finish, but I wouldn't say that that's entirely true. When it dries, it does SEEM matte, but in my opinion and on my skin (remember we all have different skin type, so your experience with this may or may not be different from mine), it seems more of a velvety satin finish. But still a lovely duo none the less! 

Wearability:

As you know, I have super oily skin. So depending on your skin type, that may affect how long you are able to wear this before it fades. I was able to get about 5 1/2 hours on it's own, and about 6 1/2 - 7 hours with a setting powder. For being super oily, that's really not that bad. And cream bluses do tend to last longer then pressed or powder.

Tutorial:

I decided to add a quick tutorial so you can see the full effect in action! Now, I literally only did my makeup for this, so I have no mascara or anything. So don't mind my makeup makeup-less face!


To start, I don't like to dip a brush in this product because it is cream, and I tend to always have a gaping chunch missing. Nice. So I just use my (clean) finger, and dot around my face where I would like to contour, or draw attention "away from".


I typically like to contour around my temples, forhead, the hollows of my cheeks and the sides of my nose to make it appear smaller. And whatever is left on my finger I will lightly dot the sides of my jaw line. 


To blend out the bronzer, I used my Real Techniques Contour Brush. 


After it's all blended, you can see that it's really not thay scary, and definitely build-able! I don't like a lot of color, so layering isn't necessary for me. In the first picture, you can better see the shadow it creates on the side of my nose.


For the blush, I do the same thing and apply with my fingers, and blend with a brush. 


And this is what the finished (or somewhat finished) face looks like!

My Overall Thoughs/Opinions:

 I loved the packaging. Very classy, and sturdy. 
Great for travel, good sized mirror.
Both the blush and bronzer are rich in pigmentation, yet applies sheer enough allowing you to build up to the amount you want.
 Super creamy. Seriously blends like a dream!
 Last several hours on my super oily skin!
No shimmers, but (for me) does not dry to a matte finish like E.l.f claims.
 I definitely would recommend to everyone to try it at least once. For $3, what can it hurt?(;

That's it for todays review, thank you for reading!

Have you tried any of the Blush & Bronzer
Duos by E.l.f? If so, which one 
and how did you like it?!


Friday, October 24, 2014

FOTN: Too Faced Chocolate Bar Palette

Hey everyone! I wasn't going to post this at first (I didn't even take pictures), but after we got back home I decided I really liked how everything turned out! The weekends are the only time I really get to take my time to do my makeup. Since I work (more like live) at a mill 6-7 days a week, I don't really do my makeup much. So you best believe I get uber excited when the weekend comes!


I did use quite a bit of products for this look. I feel like I've been using the same things over and over and neglecting everything else I have. There were also some new products I haven't tried yet, so I took the opportunity to test them out!


The lighting wasn't very consistent, so I added these two for you too see how the outcome looks in different lighting. Plus I was loving my new comfy sweater my bf bought me earlier(;

Prime and Conceal


 Rimmel Fix & Perfect Pro Pimer.
 Maybelline BabySkin Insta Pore Eraser.
 L'Oreal True Match Super-blendable Concealer.
 E.l.f High Definition Under Eye Setting Powder.

Once I toned and moisturized, I used Maybelline's BabySkin to prime my t-zone to blur any visible pores. This was the fist time using this product, expect a review (and possibly a comparison)!

I used my favorite Rimmer primer around the rest of my face. Then, I used my favorite concealer to hide any blemishes I may have and under my eyes to help brighten up my dark circles. And lastly, another product I hadn't yet used was the E.l.f HD Undereye Setting Powder to set the concealer. Though, I didn't just set my undereyes, I used it everywhere I used the concealer (i.e cheeks, chin, around the forhead).

Foundation and Illuminate


 Nyx Born to Glow Liquid Illuminator.
Revlon Colorstay 24Hr Makeup.

I didn't do anything special with these, I just mixed them on the back of my hand with a brush and applied as usual. 


 E.l.f Blush Palette in Dark.
 E.l.f Contouring Blush & Bronzing Cream.

I used the bronzing cream to contour, and the blush on the apples of my cheecks. From the E.l.f Blush Palette I used the top left peachy color right over the cream blush very lightly to set it. 

Eyes


 Too Faced Chocolate Bar.
 E.l.f Liquid Eyeliner in Coffee.
 Revlon Photoready Eye Primer + Brightener.
 L'Oreal Voluminous Million Lashes Excess.


Top Row:

 I used the 1st Star (White Chocolate) all over my lid, up to my brow bone.
 I used the 2nd Star (Milk Chocolate) in my crease.
⚫ (Very last step) I used the 3rd Star (Triple Fudge) in my outer crease to add definition.

Middle Row:

 I used the 1st Star (Salted Caramel) all over my lid, and with a blending brush lightly blended it with my crease to rid any harsh lines.

Bottom Row:

 I used the 1st Star (Hazelnut) in my outer crease and blended it out.
 I used the 2nd Star (Champagne Truffle) in the inner corners of my eyes to help brighten them a bit. Again blending everything together to rid andy harsh lines. 

That was my look for tonight! I hope you all enjoyed and thank you for reading!

Have you tried any of the new products I mentioned?
If so, let me know your opinions down bow!(:


Wednesday, October 22, 2014

Fall Favorite: Coconut Oil

Usually around Fall and Winter, I like to do what I can to really bring my hair back to life. Even though I do not use heat on my hair what so ever, it is damaged from hair dyes. This time of year as we all know, is a lot colder than the Summer months. So you can probably imagine the drastic changes our locks have to get used too as the season changes (especially if you're from New England. The weather doesn't know if it's coming or going.)

 I have long, dry, curly, very thin hair. But I have a lot of it. And as previously stated, it is dyed. My hair is also prone to breakage and split ends (sigh). 

Another bummer to add, my hair is low porosity. What does that mean? Well, basically, my hair has a hard time absorbing moisture, or any products. Knowing your hairs porosity is really helpful in terms of caring for it and getting the most out of your styling products. That's a whole other post on it's own though. If you're interested and would like a separate post, let me know in the comments!

So, how do I bring my hair back to life during these colder months? Two words. COCONUT OIL! 


Coconut oil has a ton of different uses, but my favorite is using it as a hair mask/hot oil treatment. I usually do a hot oil treatment every other week, but since this year my hair has become really dry, I like to do it every week. 


Depending on your hair and your preference, you can either use the heat from your hands to melt it, then apply; OR, you can scoop some into a microwave safe bowl and heat for a hot oil treatment. Since my hair is low porosity, I typically heat it up so the heat from the oil helps open up the cuticle and absord more easily. 

What's really great about coconut oil, it's the only oil that can actually enter the cortext (the inner part of the hair) and help your hair from the inside out. Literally! By being able to penetrate the cortext, it can help improve it's strength and flexibility. Which means less breakage and split ends! Awesome right? 

Now on to the fun part. 
Application


Split your hair in half.


-
*Don't mind my dirty shirt.. I just got out of work.


To your preference; brush, finger comb, or use a natural boar bristle brush to brush out any tangles. **Remember to always start from the bottom up!

I personally prefer using either my fingers or a boar bristle brush. Using a boar bristle brush does take longer be warned, but it's much better than a normal brush as it won't pull or cause more breakage. Especially because the bristles help evenly distribute your natural oils from root to tip. It takes me about 25-30 minutes to thoroughly brush through my hair, doing small sections at a time. Any natural boar bristle brush will do. I bought mine at Wal-Mart for around $2 and some change. However, if you're really not patient enough for that, by all means, you can use what ever brush you'd like.


After you've brushed through your hair, separate your hair into four sections. Clip or tie the front two sections on top of your head, leaving the back two down. 


Take about 1/2" to an 1" section of hair.


Grab your oil (about a tsp per section, more if needed) either hot or melted in your hand and slather evenly from root to tip. Mid shaft if you don't want to go up to your roots. This is generally how much I use for all of my hair in total. Still following about a tsp per section.


Once you have the back two sections done, bring down the front two and continue.


And lastly, it's time to wrap it up!


You can either use a plastic bag like I did or a towel. Either or helps to lock in the heat from your scalp, and really get the job done! You can let it sit for 20minutes to a few hours, or even overnight. Tonight, I'm just going to let it sit for a few hours then wash it out. 


Now, when it comes time to wash out, most people use shampoo. But fortunately, if you're no-poo or low-poo like myself, I did a ton of research and found that you can infact use just conditioner (silicone and paraben free) to rinse out the coconut oil.

 If for some reason however, that that doesn't work for you, you can add a bit of shampoo afterwards. Or you could skip the conditioner all together and only use shampoo. Again, your personal preference. Which ever way you choose, you may have to repeat as the coconut oil can be stubborn. Be sure to get as much out as possible, if not all. Leaving a little in your hair is okay, as it will act as a leave in. But too much will weigh your hair down.

And that is how you add coconut oil to your hair, and bring your hair back to life this fall! I know this was different from my usual posts, but I hope you all enjoyed. And if you have any questions, feel free to ask!

How will you bring your hair back to life
during the colder months?
Would you like to see more hair posts in the future?
Let me know your thoughts!(:


Monday, October 20, 2014

E.L.F Review: 13 Piece Face & Lip Palette

Last month I had recieved my second E.l.f Beauty Bundle, which you can read here. One of the products that was chosen for this bundle was the 13 Piece Face & Lip Palette. I was soo intrigued by this palette, because well, you all know I'm a blush girl!


The packaging is pretty plain and simple, yet different from their standard colors with the touch of purple. However, the actual palette it self is very compact and sleek with a matte finish. And of course the Eyes Lips Face name right on front.


As you can see, the prettyness doesn't stop there. The inside is simply gorgeous! You get two blushes, two bronzers, and nine lip shades. The palette also includes a lip brush and a blush/bronzer brush, either of which I probably won't use. 

SWATCHES

Blush and Bronzers:


The first two swatches on the left mirror the blush and bronzer on the left side of the palette. The first blush is a pretty peachy neutral shimmery color, while the bronzer is a light golden shimmery color. I don't typically like shimmers in my bronzers, but if you're going for more of a luminous look, this would be good to use. 

The two colors on the right are also the blush and bronzer on the right side of the palette. The second blush is a light pretty baby pink color, and the bronzer is a slightly darker color than the first one you see. Both again are shimmery. But as you can see, they are all equally and nicely pigmented! For $8, you really can't beat that!

Lip Shades:
(Posted in the order of the palette)

(Top row)

(Middle Row)

(Bottom Row)

The swatches for the lip shades were a bit patchy the first time around. Evidently, I had to go over twice to clean the patchyness, and to see the color better. For the most part (expect for the bottom row), the pictures are true to their color. The bottom row is a bit brighter but not a huge difference. 

All the shades seem to be moisturizing and not that sticky like a lipgloss. They all also have a very slight barely noticeable shimmer to them. So much that I had a hard time deciding if they did or not. 

My overall thoughts/opinion

I loved the sleek packaging and the overall look and placement of the face and lip shades.
E.l.f says this is great for on the go, but I feel the dimensions of the palette are a bit too big for me to want to carry around. Definitely won't fit in the makeup bag.
 The case is very compact. I feel assured that if I did bring it with me, it won't open up in my purse. 
 Even though I said I probably won't use them, I do appreciate the fact E.l.f provided a face and lip brush. Will certainly come in handy if I forget mine!
 The pigmentation is very impressive. Especially the blush and bronzers!
Very inexpensive, great if you're on a budget.
If you're a lip girl, you'll love this palette. If not, I would skip it. Although I love the blushes, I know I won't wear the lip shades often.

And that is all for this quick review, I hope you all enjoyed!

Have you tried this palette yet?
Leave your thoughts and opinions below!


EOTN: Too Faced Chocolate Bar

About a month ago I got my hands on the Too Faced Chocolate Bar since I had a 20% off coupon. Knowing how expensive they are, I did my research to find a good palette I wouldn't regret. Even though I had a coupon, it would still be expensive compared to what I'm used to paying, so I really took my time reading through every bit I could find on it. The Chocolate Bar had soo many great reviews, I knew this was it. This was going to be my first Too Faced purchase! So I was really excited to see that it was still in stock.  


I've played around with this a few times, but so far I came up with one look I really liked. Over the weekend my boyfriend, daughter, and I went to UNO's in Providence, so I wanted something nice and classic, but a bit sultry at the same time. 


This really is such a gorgeous palette, I wish this phone took as good of pictures as my old one (I'm sorry you guys :( ). I promise these colors are so much prettier in person, this picture does them no justice. But they smell amazing! These shadows are made with 100% cocoa, and they seriously smell of just that!


And this is the look I came up! 


How I got this look:

I used E.l.f smudge pot in Back to Basics as my base.

Top Row:
 I used the 1st Star (White Chocolate) all over my lid up to my brow bone, and in the corners of my eyes and the inner part of my lower lash line.

Middle Row:
 I used the 1st Star (Salted Caramel) in my crease.
I used the 2nd Star (Marzipan) all over my lid.
I used the 3rd Star (Amaretto) on my upper lash line (to complete the look once the rest of the eye was done).

Bottom Row:
 I used the 1st Star (Hazelnut) and blended it out in my crease and up and the outer part of my lower lash line.
I used the 2nd Star (Creme Brulee) and tapped it lightly on my lid over Marzipan.

For my lashes I had used my L'Oreal Voluminous Million Lashes Excess. 

So that's it for today's post, I hope you all enjoyed and thank you for reading!(:

Have you tried the Chocolate Bar yet?
If so, tell me how you liked it,
I would love to know!